Identify Mode
Mode Icon:

Mode Cursor:

Mode Function: Identify
Supporting Functions:

Pointed profiles in X-rayed plots will be highlighted in their original colors. See here for an example.
Keyboard Accelerator: R, G, B, C, M, Y, 0, 5, and 1 for setting the identifying color.
Use this mode to find out detailed information on the data represented by graphical icons in a viewport.
There is an invisible rectangle, the hot spot, in front of the pointing finger. When the left mouse button is pressed, any icons pointed at by the finger will be highlighted in the current identifying color, which is always displayed on the mode icon and the mode cursor. You may move the hand cursor around while the mouse button is being held down; icons leaving the identifying hot spot will resume their previous colors. Right after the mouse button is released, all variable values of the observations represented by any icons last pointed at by the finger will be listed in a list view dialog such as

If the Shift key is held down when you release the left mouse button, you'll get a dialog like the one in Figure 9-11; just select and move the variables whose values you would like to inspect from the left Attributes column to the right Selected Attributes column. The top-to-bottom ordering of variables in the right column is mapped to the left-to-right column ordering in the generated list view. You can change the ordering with drag and drop.
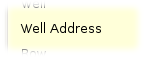
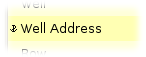
Categorical variables are displayed over a light yellow background; numerical variables over a light blue background. Selected variables in both columns are displayed over a slightly more saturated background , as illustrated in the following examples: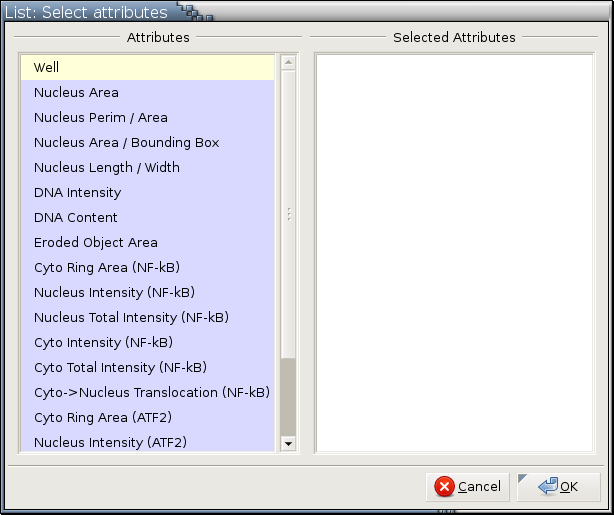
|
|
- Left
If the clicked variable is not selected yet, select it and make it the anchor. Once it's an anchor, there will be an anchor icon,
 ,
to its left.
,
to its left.
If the clicked variable is already selected, deselect it. If it's also the anchor, remove the anchor; there will be no anchor afterward.
- Ctrl-Left
Clear any existing selected variables, select the clicked variable, and make it the anchor.
- Shift-Left
If the anchor is set, select everything from the anchor to the clicked variable. If the clicked variable is the anchor, do nothing.
If the anchor is not set, select the clicked variable, and make it the anchor.
Drag and drop with the left mouse button.
S [1] moves all selected variables from the left Attributes column to the right Selected Attributes column. These selected variables will be appended to the end of any variables already in the right column in the same order they appear in the left column. If there is only one selected variable in the left column and it is not at the very bottom of the left column, the variable right below it will become selected after it is moved to the right column. This means if you would like to move a contiguous group of variables from the left column to the right column, you can select the topmost variable, press, and hold down the S key until all the variables you want are moved to the right column.
Shift-S [2] makes the left Attributes column empty and move all variables to the right column. All variables will be listed in the right column in the same order as they are listed in the left column when the menu is first popped up.
D (for Deselect) moves all selected variables from the right Selected Attributes column to the left Attributes column. These selected variables will be appended to the end of any variables in the left column in the same order they appear in the right column. If there is only one selected variable in the right column and it is not at the very bottom of the right column, the variable right below it will become selected after it is moved to the left column. This means if you would like to move a contiguous group of variables from the right column back to the left column, you can select the topmost variable, press, and hold down the D key until all the variables you want are moved to the left column.
Shift-D makes the right Selected Attributes column empty and move all variables to the left column. All variables will be listed in the left column in the same order when the menu is first popped up.
Supporting Functions
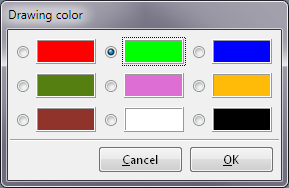
- Set Identifying Color...
Selecting this menu entry will generate the following menu:
Another way to set the identifying color is to use the following keyboard accelerators over a plot in identify mode:
R [3] for red
G for green
B for blue
C for cyan
M for magenta
Y for yellow
0 for black
5 for gray
1 for white
- Size Hot Spot...
Selecting this menu entry will turn the cursor into
 on a Linux machine or
 on an MS Windows machine.
Just press and drag the left mouse button to form a new
paint stroke rectangle.
on an MS Windows machine.
Just press and drag the left mouse button to form a new
paint stroke rectangle.
You can abort while specifying a new hot spot by clicking the right mouse button.
Although you may resize the hot spot, we recommend a tiny size to create the illusion that the finger is pointing at something.
- Use 10x10 Hot Spot
Set the identifying hot spot to a 10 by 10 rectangle. This is the default size.
- Use 3x3 Hot Spot
Set the identifying hot spot to a 3 by 3 rectangle.
- Use 5x5 Hot Spot
Set the identifying hot spot to a 5 by 5 rectangle.